
Flax Project


Behind the Studio Doors
17 Stages of Art
Searching and Deciding
Stages 01 to 03
02: Choosing
03: Highlighting
I learned about the historical uses of the building and got some really great information and old images. I also got in touch with a local archivist for high resolution maps of the area through the years. I collected lots more info and images from online research, especially about the brand, Kangol which took over the mill in 1938. In 1978, the factory became the biggest hat manufacturer in the world. Prior to the Flax Works building being built in 1859, an Iron Ore furnace was built on the land.
From all of this research material, I began narrowing it down. I wanted to transform it into an art piece that visually represented all the important elements. I created a mood board for each element in a way to help expand and visualise my ideas.
Once I had the elements for the project in place, I brainstormed ideas pf what would and would not work for the project. The workable ideas became a framework on which ideas would work to build a mural.
01: Research


02: Choosing


Planning and Editing
04
05
06
04: Layout
05: Visualising
06: Editing
After visiting the Flax Works and seeing the space I will be hanging the work, I created a digital illustration of the space. It was a great way to see how the project would look in the space. This was before the decision was made to move the project to the Flax Café next door.
With the space in mind, I could see a wide piece of fabric draped up on the wall. A bit like a tapestry. I took this idea and planned to create a 350-400cm wide piece of fabric, that included all the chosen elements.
Once I knew which elements I was going to use in the project, I chose the best images and mapped out where they would need to sit in the project. This would ensure there was space for everything I wanted to include.


Planning and Editing
Stage 04:
Layout
Drawing out the space to work back into with a digital visulisation of what the piece would look like. This helps work out the size of the piece and the elements.
Stages 05:
Visualising
Now I had a digital illustration of the space, I could map out what how the sections would look and how the piece would look altogether. It really helped plan out sizes and space for the piece.


Stage 06:
Editing
I edited together three large files to send off for digital printing. This is a great method of printing to make sure all details are kept in the images.
Starting to Create
07
This was the first creative drawing part of the Flax Project! I loved creating this part of the project. After sourcing a high resolution map from a local archive, I invested in a projector to make sure I could pick out all the best details from this map and transfer them onto the large piece of canvas fabric, Trying to orient the fabric was really tricky! But working with my favourite medium, indian ink was a pure joy. It took a full day to get map drawn out and I am really pleased with the impact it has on the art piece as a whole.


Finding and Flowers
08
09
10
09: 1st Flowers
10: A Remake
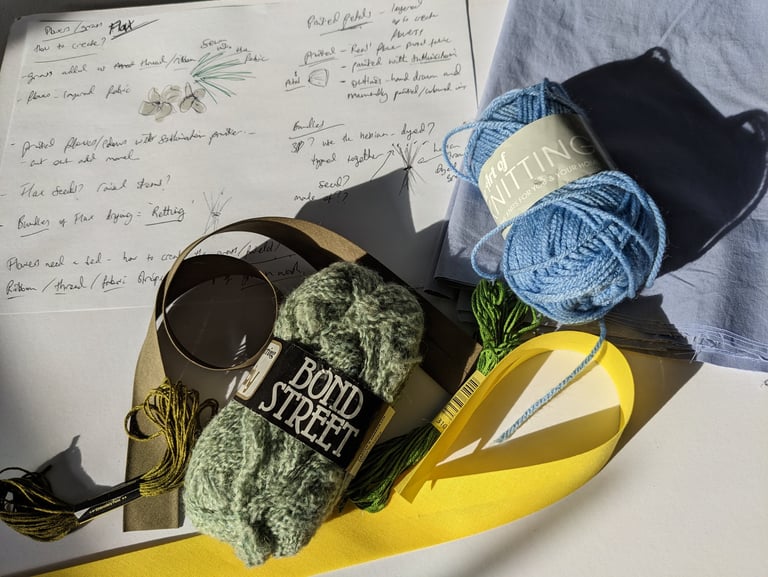
Now I knew what the project was starting to look like and which parts I was choosing to recreate in my piece; I started collecting fabric and materials! It was a lovely challenge and something I was always switched on to. You never know what material will match the texture and colours.
The next creative part was making each flower individually. I dyed fabric, ripped material, coloured yarns and all sorts of fabrics to create a wide variety of stock to recreate the flowers. I started creating these flowers by making them individually. I spent DAYS on these flowers... but... they didn't look right. So were scrapped in the end! Sometimes you've just got to take the losses and know what looks right in your mind,
For the second round of making my flax flowers, I decided to create the meadow directly onto fabric and build them that way. By now, I had mapped out the project and knew how big the space was for the flax flower meadow should be, so I painted fabric and went from there. I sewed directly into the fabric and added the flowers (that are now being used on the finished project) though, again, it didn't look right. It had the right elements, though still looked a little clumsy. SO, back to the drawing board or the flowers. I decided to step away from the florals for now and focus on something else - a good idea I think.
08: Collecting & Dyeing


09: 1st Flowers


Stitching and Building
11
12
13
12: Baskets
13: Building & Painting
The time has come! I've now made the decision that I need to take the plunge and start sticking and sewing elements down. It was a scary dropping off point but it HAD to happen at some point. It did make the whole process so much easier to build on once the elements were starting to be permanently placed. I really enjoyed sewing some of the fabric down as I had cut around small details. I wanted to keep the fabric theme in mind and keep to a free flowing, organic type of art piece.
Reviving the factory shop floor was a wonderful task. I've really enjoyed studying the works that have gone on in the building and adding a modern touch just felt right. I took the digitally printed photo of the factory floor and cut out the large woven baskets from the image. I made sure to keep to the edge as much as possible as I wanted to add cotton fabric behind the digital print to create layers. I then hand drew the baskets with charcoal. I initially planned to use indian ink like I did in drawing the map - and started using the charcoal as an outline. But I then found that I liked the dusty, dirty feel of the charcoal more and felt it matched the factory floor environment more. So charcoal it was!
This part was equally tricky in places and simply easy in others. I knew once I saw the outside of the Flax Works, that I HAD to include the beautiful shape of the stone roof. The turret type shape has always been such an identifiable part of the building which I knew would make a stunning addition to the piece. That bit easy, by creating the negative space as the roof continues through the sky. Though the windows were actually really tricky. I couldn't figure out how to continue the building through the rest of the elements. I played again with negative space and used the windows as a perfect way to highlight features on the map - it worked! To then merge the sky into the fabric, I worked back into the colours and hand painted sections of the blue sky to blend the parts perfectly. I think it softens the edges really well.


Stitching and Building
Stage 11:
Adding the Elements
A lovely part of the project - cutting out all the special details from the digital prints and sewing them to the canvas base of the piece. I made sure to stitch round each brick and keep all those key lines within the fabric. I wanted to create and an organic feel to the piece but ensure it's really not going anywhere!


03: Building & Painting


Stitching and Building
Stage 14:
To add to the organic feel, I made the bricks from fabric I had either collected, painted or dyed over the last few months. I also hand cut bricks out from the digital print of the wall to ensure texture.


The Final Flowers
15
16
16: Pollen
It may be my third shot at creating the flax flowers, but they're only getting better! And I'm glad I did make the decision to scrap the other two designs. I wanted to create a more free flowing look to the flowers and I started by painting directly onto the space I left for the meadow. This was pretty nerve-wracking but a must. After creating a green base and blending in yellows, I laid out the flowers I made from painted fabric. After making sure they were arranged just where I wanted them, I hand sewed each flower onto the 3 layers of fabric - this took a really long time! Though I wanted to keep the flowers moveable and lean into the organic look of nature. A few finger dents later, it was time to work back into the meadow with added textures. I decided to add the dyed threads and yarns to the flowers to create almost a vine effect. It worked well and needed plenty UHU glue! They're well and truly stuck down.
How to add the pollen to the flowers had been floating around my head from the start of this project! I'd dyed many different types of fabric - tulle, cotton, linen and worked away at pulling the threads. Some fabrics looked like they should have worked, but for whatever reason just didn't quite make sense in the design. I had painted and dyed some cotton wool pads which, once pulled apart, created a lovely fluffy, organic feel. Perfect! I kept this to the side and painted a yellow/orange/white base to the flowers pollen. Then added the dyed cotton after - not too much, but enough to hint at another layer of texture.
15: Flowers Round Three!


16: Pollen


Finishing Touches and Fixtures
Stage 17:
Adding the Eyelets
I triple checked the measurements over two days to make sure I was cutting and adding the eyelets in the right places. It'll all be down to how it hangs on the wall - fingers crossed! Adding the eyelets was pretty tricky even with the correct size tool. Teasing them with some heavy duty pliers did the trick before hammering the top eyelets into place. And there, done! Signed and ready to hang.


Gemma Keith Designs
Cumbria, England.
Original, hand drawn & painted designs
Hand printed products
Over 17,000 online sales
Reviews & Awards